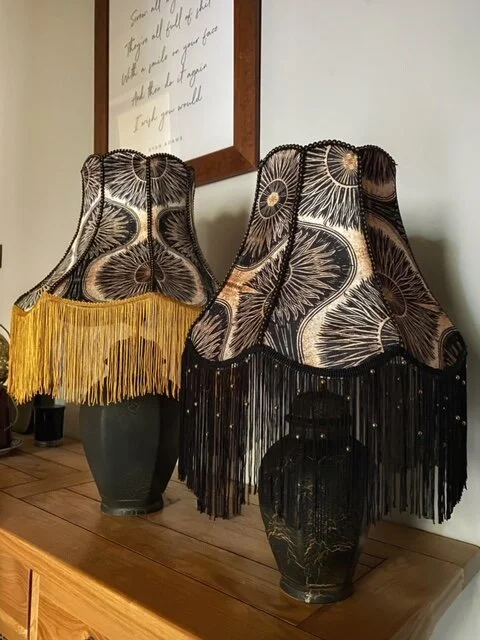
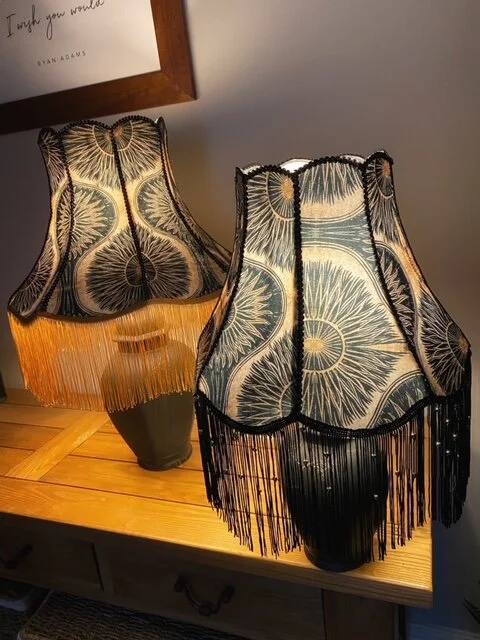
How to Re-cover a Bell Lampshade
This is as easy as it gets when it comes to a DIY lampshade. I re-covered one large and one small scallop bell lampshade. I used the same fabric and trim for both, but I put a black fringe onto the small one and a gold fringe onto the large one.
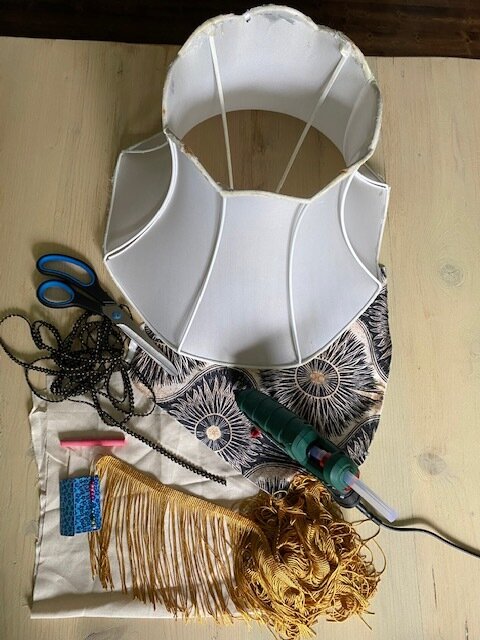
Step 1
Take your paper or canvas and lay it over your shade. Use tape or pins to secure it around the frame. Now, using chalk or a pen, draw around the outline of the shape. The scallop bell lampshade has eight panels so, I traced around one of them, cut out the canvas and used that as a template for my fabric; almost like a dressmaking pattern.


Step 2
Pin your template onto your fabric of choice. This will help hold it in place when you come to cut around it. You can also trace the template onto the fabric, if you find that method easier. Carefully cut around the template. You’ll want to cut it accurately so don’t overcompensate by leaving an edge around it. I repeated this process eight times.


Step 3
You will now have eight sections. I used a glue gun directly onto the metal frame of the lampshade. I glued about 10cm at a time and stuck each section onto its frame. Try to butt each panel against the last; if you overlap then the fabric can stick out too much and you’ll have trouble gluing on the trim. Once all panels are glued down, cut off any excess at the top and bottom.


Step 4
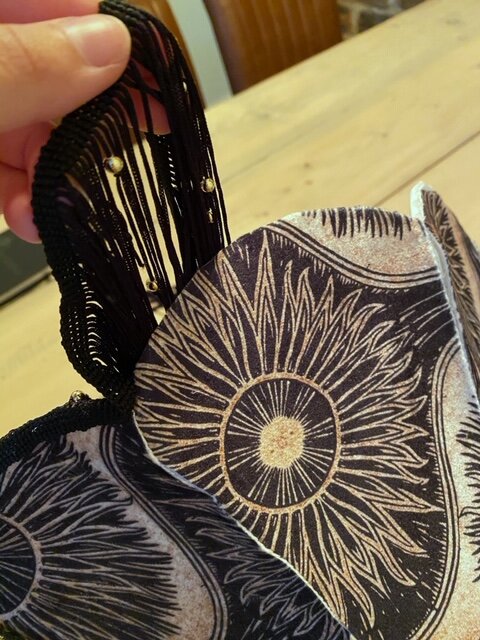
Glue on the fringe to the bottom of the shade. Go with the curve of the scallop and try to fold it neatly at the corners. Fringing and trim is nice and malleable so it’s easy to bend into shape. You can get creative here and cut your fringe to mirror the curve of the scallop.

Step 5
Glue a section of trim between each panel and along the top scallops. You can also add trim to the bottom scallops if you want a more uniform look. And that’s it! Your lampshade is ready for its base.


Top tip: Turn your glue gun on and off periodically. Your glue gun may not do this, but mine was a bargain Lidl buy and it has its flaws. If I leave it switched on for too long, it starts to drip when it’s resting. Also, the glue becomes too runny and harder to work with. If you turn it on and off periodically then you can still use it the whole time but the glue stays at an ideal temperature.
I thought about lining my shade but the fabric I used is really thick and has a canvas type backing, so it wasn’t necessary. The large shade had a net lining previously, which I didn’t rip off with the old fabric, so I kept that in place. Let me know what you think in the comments.